Table of Contents
Setting up
To create records you need three things: the baseId, tableId, and an authenticated instance of Flairtable (see sign in tutorial). The tableId is very easy to find: it's just the
name of the tab in your Airtable base.
The baseId is a bit trickier. You need to go to the Airtable API docs and click on
the base you wish to use. The baseId is something that's immediately shown.
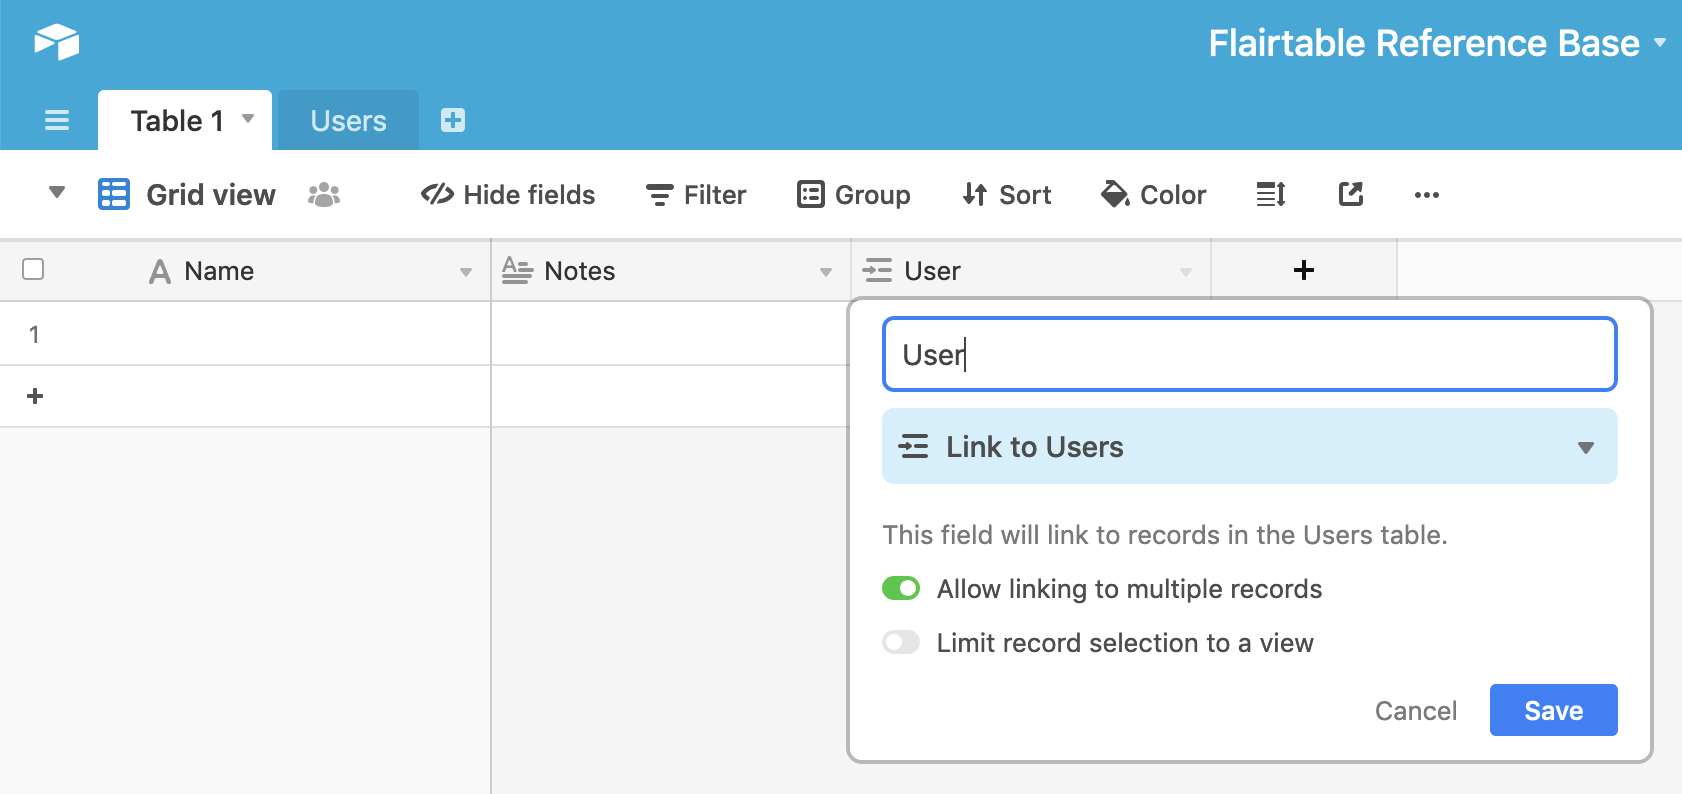
Lastly you will need to create a column called User in the table you want to add records to. This is to make sure
that a user can only create/edit/delete rows that he/she made.
The User column should link to the Users table you created following the setting up authentication guide.
It should look something like this:
Airtable love
The Delete records call is 1:1 translated to Flairtable. If you prefer their docs (they're really good):
you can just follow along there.
Remember to use the Flairtable SDK, base URL and API key though!
Usage
To delete records, use the destroy method.
The first parameter to destroy is an array of up to 10 record IDs to delete.
Code samples
You can also omit the callback parameter. This will result in a 'thenable' promise.